In 2008, after two years of interviewing pond installers, viewing countless pond installations, and looking up many pond design ideas, I decided to take on the project myself. The “affordable” installers wanted far too much money in my opinion (anywhere from $8K – $25K) since pond installation was pretty popular at the time. The ponds they had created didn’t look very natural, just some pretty uniform stepper boulders stacked on top of each other.
Below you will see the before and after photos for this extensive, but very doable project. If I can do it, so can you! Here are the BEFORE and AFTER views:
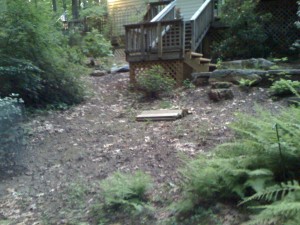
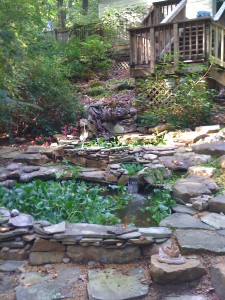
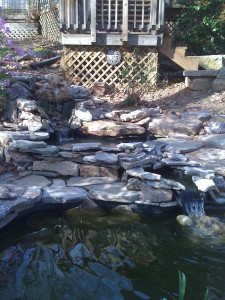
Before you start your pond project, please ensure that you research your local building codes and community rules on water garden and pond installation and get all the necessary approvals. Some jurisdictions require that you have at least a four-foot fence around any water garden (similar to swimming pool restrictions). You don’t want a youngster getting into the pond area unsupervised. We had previously installed a six-foot black plastic-coated metal chain link fence around about an acre of our back property for our dog’s free roaming. The ponds project location was inside the fence. We love the fence as it also keeps the deer at bay, and “disappears” into the woodline. (The chain link fence is also available in green, brown, and tan colors.)
My husband had purchased a Kubota tractor for heavy lifting, for lawn mowing, and for snow removal on the property. (Remember “Snowmageddon” on the East Coast a few years back? The Kubota was sure helpful during that cleanup!) The Kubota is a great workhorse for digging large holes and carrying/moving boulders, gravel, mulch, sand, and plants. Let the tractor do the hard work, if you have one.
Inspiration of an existing image is usually what places the creative thought into the mind. A few years earlier, we’d had a local landscaping designer and his company install a hardscape patio and stone wall in our backyard. Two of the large boulders that they placed were my inspiration for the ponds. And the two boulders became integrated into the ponds project. The are located to the right of the wooden steps from the deck in the above photos.
It was time for a trip to a local stone yard to look at river rock and boulders. What I found was that I needed more of a “plan” before I was going to purchase any materials. I did have a sloped site in mind in our backyard, wanting one pond to be at a higher level than the other pond. The site was shady which was preferable to full sun which encourages algae. Over the years of looking at different pond designs, I still wasn’t sure how my project would come out.
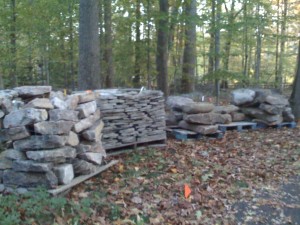
Working with a lovely young designer at the stone yard’s Design Center, I was able to determine what types of stone I would need to purchase for my project. Not only did I need larger “stacking” boulders — or “steppers” — to make my installation look more “natural”, I also needed smaller stacking slate pieces, larger bluestone rocks and some variable size small boulders. I stuck with gray tones that had either blue or purple/red tinges to them. (Did you know that landscaping rocks come in different hues? I didn’t!) The designer pointed out that the lichen on some of the rocks would add interest. She’s right, and it has attracted moss which also adds interest. Several pallets of various sizes of rocks arrived at the house.
Since we have large established trees in the backyard and near the pond installation area, I chose to use pre-formed black plastic pond liners instead of flexible liners for the ponds themselves so that tree roots would not poke through. Additionally, I wanted it to appear that the two ponds connected together, so I purchased two connector pieces with a “waterfall” appearance. For me, having two separately functioning ponds was a far better idea than two connecting ponds. For a lot of reasons. In the end, I only used one of the connectors. And noting some other pond designs, I planned a patio for relaxation next to the ponds.
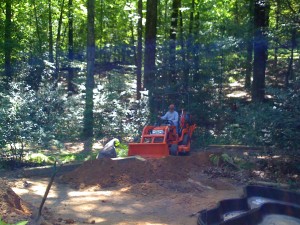
After the holes were easily dug by my husband on the Kubota tractor (note the photo of our viper “visitor” who was very interested in the newly dug clay dirt…but not interested in us, thank goodness…and left soon afterwards), we spread sand into the holes to cushion the bottoms of the black plastic pond liners, and added additional sand along the edges.
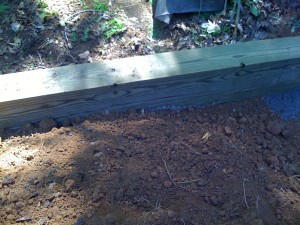
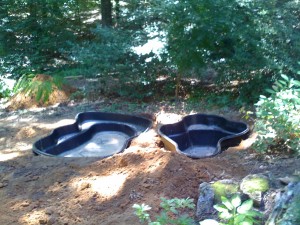
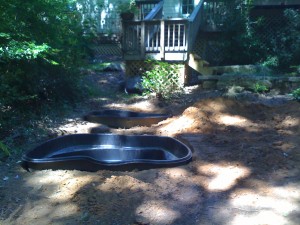
It took a while to get the edges as level as possible — lots of trial and error and patience was necessary. (Be aware that your ponds will settle by the weight of the water and your “edges” may not be level afterwards.) I did want to slope one pond edge on each pond down slightly on one side for water overflow drainage purposes. We added gravel along those edges so that the water didn’t pool and cause the pond liner to “float.”
The next step was to add water to get the pond liners to “settle.” That was great until I realized they weren’t level, and had to siphon out all the water and re-adjust the pond liners all over again. Several times. Patience!
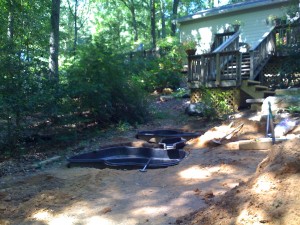
Finally the pond liners were level. I could then move forward with the more aesthetic part of the design of the ponds. It was at this point that I felt the project was really coming together nicely.
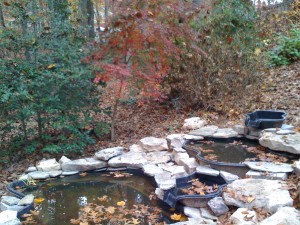
At this point, it was time to start placing the boulders and larger rocks around the ponds and the top waterfall area. That took a few weeks to get straight because I didn’t want it to look like just a pile of haphazardly placed stones. Placing each boulder and stone was an act of love, and to this day, I remember placing each one. After all, I was doing all this pretty much by myself! My husband (and the Kubota tractor) did help move the larger ones.
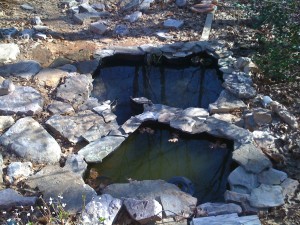
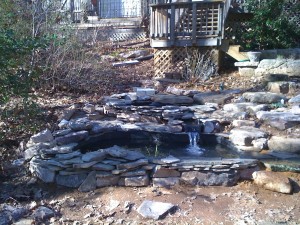
Then I decided I wanted a “real” waterfall at the top, not just a basin spilling water to the next level. Spent some time looking at waterfall options, and didn’t like any of them. Eventually, I went to our local garden center and found a large boulder with a hole chiseled in the middle of it. Success! Had the nice young gentleman load the boulder into my car and brought it home.
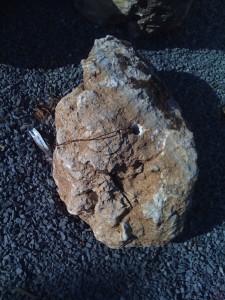
Used a flexible pond liner for the waterfall area, and used some cinder blocks to “prop” up the boulder. Also had found a connector to fit the hole, as well as rubber hoses to run from the pumps in each pond up to their associated “waterfall.” I was thrilled! I would then have a waterfall that dribbled water slowly out of a boulder and looked natural. Wait — not so fast. I had more of a “fountain” until I plugged up the hole a bit with a rag. One thing you need to watch about ponds and waterfalls is not shooting the water outside of the pond/waterfall perimeter or you will have no water in the pond — and quickly! Now, I have a water flow system with better rock placement that works wonders.
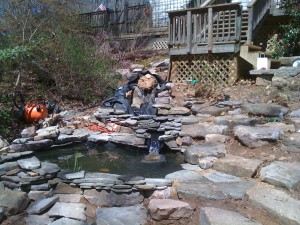

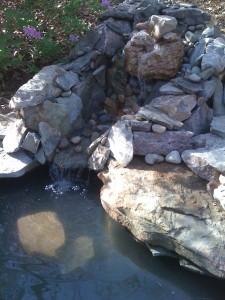
My first pond pump filters had just small sponge pre-filters attached to them. I set up the ponds and started them running for a week or so. For the next several weeks, I was still placing boulders and stones around the pond. That is really an ongoing process to this day. Adding, subtracting, moving rocks around.
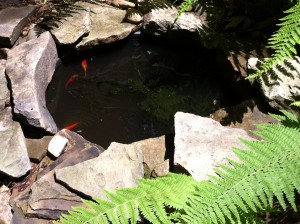
Then I purchased fish. Since I’d purchased cheap goldfish for the tiny front pond that I installed a few years earlier, I purchased 10 more cheap goldfish for the bottom pond, and then “splurged” for 6 Shubunkin goldfish for the top pond. Prior to purchasing fish, I used Mosquito Dunks in the ponds to keep the mosquito population from multiplying.
After a week or so, I found out that I was either going to be cleaning the small sponge pond filters every other day, or I needed to find a better filter system. Goldfish produce a lot of waste. I went online to find bio-filters that were large and did the job, as well as providing beneficial need to the water. Now I clean them about once a month during the months when the pumps are operating, when the water looks murky, or when the water flow slows down.
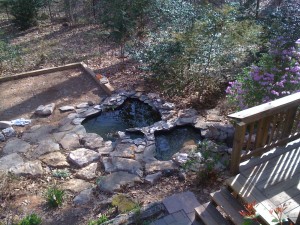
Since we’d had our front walk replaced with brick pavers, we had quite a number of slate pieces left over from the old walk. I’m a firm believer in reusing anything that can be reused. We had many 18×18 inch square pieces along with 24X18 rectangular pieces. I installed a slate patio next to the ponds so that we could sit there and watch the pond action. It took a weekend to lay the sand and then bluestone dust and level the pavers over and over, which I did myself, with some supervision from the dog. And I added some large rocks as a sort of “step-up” to the bottom pond and as decoration.
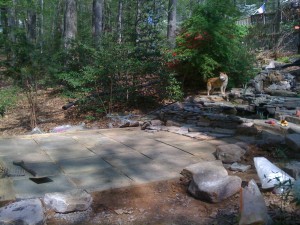
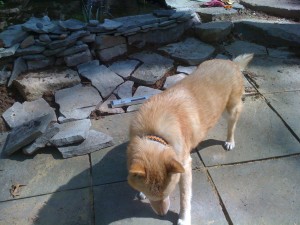
Came out pretty neat. Also, I continued the stone steps that were installed by the professional landscaping company so we would have a completed path to the ponds from the patio. I added some “stepper” stones to extend the stone walk to the patio. Now that was fun, laying those huge rocks into a stairway, and feeling like I’d accomplished decorating the whole world at the time.
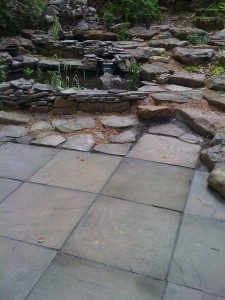
Then it was time for pond plants. The first year, I made the mistake (my opinion) of adding Lotus Flower and Water Lettuce plants. Both of those plants multiply profusely and take over the pond. While you do want some coverage to hide your fish from predators, you don’t want the plants to take over the entire surface of the pond. I tend to like the dwarf papyrus for the shadier ponds. Adds height and interest with its leaves. Also, I like parrot feather (which is not permitted in some areas due to its invasive nature) and “seaweed” to help clean the pond water. It wasn’t until the seaweed started to take over and provide some cover that we had tadpoles and our first fish hatch in June 2010. Can’t have baby fish and frogs if they’re going to be eaten! The seaweed plant has pretty white flowers as a bonus.
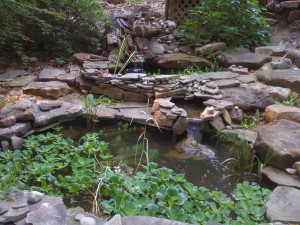
Next, I planted various groundcovers around the boulders, a “Lady-in-Red” hydrangea which is now huge and has the prettiest BLUE flowers until they turn a lovely pinkish red color, hostas of a number of colors for contrast, and a lot of ferns including the purple-hued Japanese painted fern. The ponds are in a pretty shady area so these plants do well. In the summer, I plant impatiens as an annual. Sometimes the impatiens reseed and pop up again the following year.
It was about a week or so before the first frog inhabited the ponds. Over the years, I’ve had as many as 42 adult frogs at one time. We were so proud to have the bullfrogs with their low blurps. I have trouble tolerating the high shrill of the tree frog chirps, so the bullfrogs are quite welcome. A bullfrog is currently “blurping” as I write this posting.
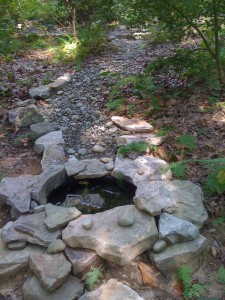
And over the years, I’ve added one more tiny pond in the backyard. It’s at the end of a dry creek bed, sort of as a “surprise” as you round the corner of the path (and don’t we ALL love our garden surprises???).
I’ve built a second patio, the Stone Terrace, out in the backyard to use up the rest of the slate. I’m particularly proud of that patio since I used boulders as the edging and I think that looks really cool compared to the usual 6×6 lumber edging. We have gravel paths to connect it all. I used gray gravel and sprinkled a bit of reddish-purple-colored gravel here-and-there so it wouldn’t look like a “road.” See that project on the Stone Terrace page.
I believe that the ponds project cost us about 1/5 for the materials that we purchased (not counting the Kubota tractor, of course!) than what the entire project could have cost had we contracted it out for the lowest price — which may have been considerably different to what I designed and wanted. And yes, it took up my weekends for several months, yet I have such a tremendous feeling of accomplishment. It feels wonderful to hear, “Did you really build all this? Yourself?” And I can say, “Yes, I did!”
I hope you have enjoyed hearing about the ponds project as much as I’ve enjoyed telling it! What’s your next garden project?
UPDATE: Recently, I updated the front pond’s design. Read about it in A Water Gardening Remake!
