The stone terrace project originally evolved from my wishing to be “green” and reusing existing materials. Our front walk had to be replaced a few years after we moved into our Virginia home. We wanted a red brick walkway to replace the gray slate and fading orange brick walkway that was previously installed. The original slate pieces were slippery when wet, and quickly grew moss and mildew which didn’t work as part of a heavily traveled walkway. But what was I going to do with 18 pieces of slate that measured 24″ x 36″ each? Well, what about a stone terrace?
We had (and still have) a fairly high tick population on our wooded property. Our beloved dog Fuji succumbed to Lyme disease a few years ago, and I’ve never forgiven the ticks. Never will. They tended to concentrate in the “fern grove” which our dog loved to wade through…which meant we would be pulling ticks out of his lovely fur. I still have the “memorial tick jar” full of alcohol. Morbid, I guess. Well, moving on….
The fern grove was overtaking its original boundary which was enough for me to decide to rip most of it out. I haven’t yet met a gardener who hasn’t ripped something out to plant or install something new. Have you?

My first step was to figure out how to lay out the 18 slate pieces. The most sensible design turned into a 9×12 foot terrace. Just enough room for a small table and chairs, or a chiminea and some surrounding benches.

I had some small boulders “left over” from the ponds project that I needed to use. Would it make sense to edge the stone terrace with boulders instead of using the usual 6×6 pressure treated lumber? I thought so!

You will notice by the surrounding foliage that I started the boulder perimeter during late winter. We had to wait until Spring for the ground to thaw so we could dig out the ferns.
The next step was to line the area with landscape fabric. I used the heavy duty fabric which allows for drainage but stops weed growth. Additionally, the fabric helps keep the gravel base in place and not drain or slip out through the cracks between the boulders.

Then, I added gravel to level out the area. I used string and a leveler to determine the level and how much gravel fill was needed. This is another example of how the Kubota tractor came in handy to deliver the gravel to the site.

The gravel had to be tamped down and bluestone gravel dust added on top prior to laying the slate pieces. Patience is required in leveling the slate.


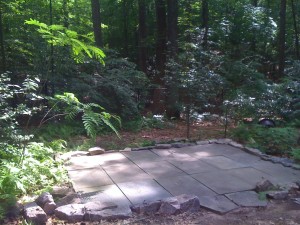
The boulders were stacked along the edge, along with a last trim of the landscape fabric so it would not show. And Voila! A completed stone terrace!
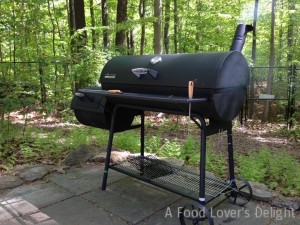
Over the past few years, my husband has turned the Stone Terrace into the Smoking Terrace for his new outdoor smoker! Check out some of my recipes using my husband’s smoked meats on my food site at A Food Lover’s Delight.