
Change in the garden is inevitable. Each year, I find something new to build, or something to remove and reuse. This Spring, it is the Slate Walkway Project.
Years ago, our favorite Merrifield Garden Center designer had designed and installed a welcoming brick walkway from our driveway to our front door. It’s a nicely done dry-set red brick and looks nice with the white and red bricks on our home. The original walkway was built with slate slabs and some bricks which were laid directly on the dirt. The slate walk would heave along with the freezes, and squish up and down and around when the ground was wet. We needed the new walkway for safety reasons, too.
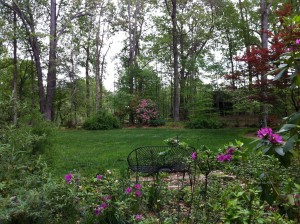
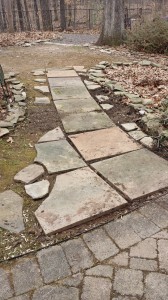
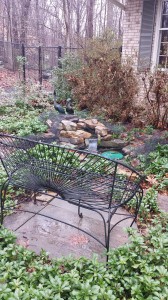
As part of the front walk project, and to reuse some of the displaced slate slabs, our designer also installed a “homeowner’s special” slate walkway that connected another piece of our circular driveway to the brick walkway. I’d added a lovely wrought iron Monet bench from the former Smith and Hawken company. That bench hosted many peaceful seatings especially during long days of gardening.
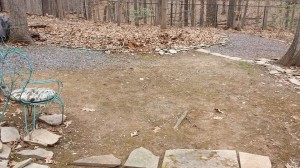
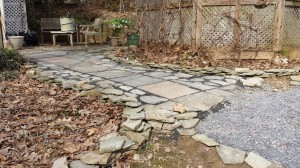
Over the years, pachysandra overtook the slate walkway, we had some diseased oak trees removed, and other undesirable plants started to grow in that area. And in the backyard, we have an area that’s shady where the grass won’t grow. Usually weeds and moss will grow easily in this muddy spot. Since we adopted our second dog, we needed a better walkway. Also, we use this path to bring firewood to the lower level patio for use in the basement fireplace.
I added about 20 bags of two kinds of gray gravel to connect the previously laid gravel paths in the backyard. I’d originally planned to build a fire pit in this area, however, that didn’t make sense to me now that we have the dog. Our dog likes to climb in/on objects…so we’ll save the fire pit until he’s a bit older.
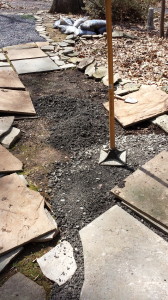
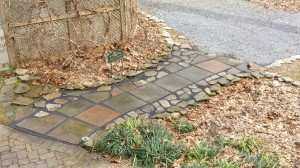
My first order of business was to lay out the slate pieces and stones on the bare soil to see how I wanted to fit them together. A two-inch layer of bluestone subbase will be added to the area before I set the stones. The bluestone subbase will act as a base for the slate slabs, and also for the decorative slate pieces that were left over from a previous pond project. The middle slate pieces of the path will need to be brought up at least two inches as the ground is currently sloped a bit there.
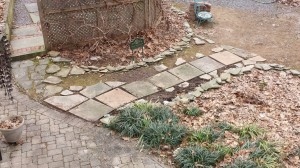
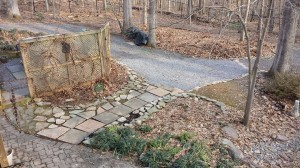
Here’s the other muddy area after the bluestone subbase was added. I don’t use sand in my projects. We have so much debris that will fall in between the slate pieces, that weeds will grow happily in the sand. Weeds grow in the bluestone dust also, but not as many. The bluestone dust is also called “screenings”. Your local garden or stone center staff can help you select the correct product.
A trip to the garden center reaped 15 bags of bluestone subbase, and 5 bags of bluestone dust.

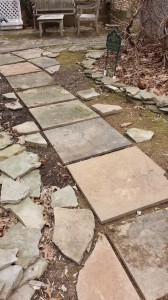
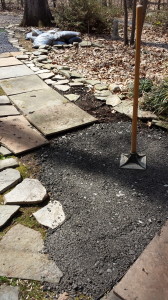
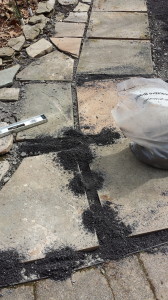
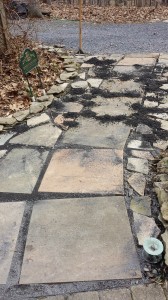
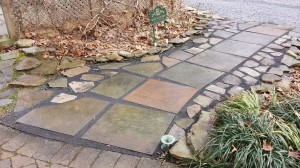
Instead of removing all of the slate pieces, and having to piece it all back together, I used a technique that’s been successful for me in the past. I just pulled up each slate piece, turned it over, and set it next to its final resting place. Then I spread the coarser bluestone subbase, packed it down with a tamper, leveled it out, set the slate, then checked for level again. You may need to pick up and re-level the stones many times. I also set the smaller more decorative stones along the sides. They are meant to transition over to the stacked stone edging on either side.
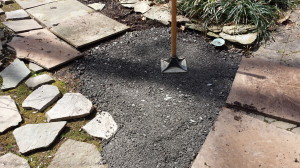
When the slate pieces were all set, I then used a broom to sweep in the finer bluestone dust. You can also use the bluestone dust over the top of the subbase to create a smoother footing for the smaller stones.
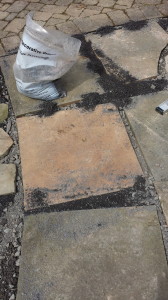
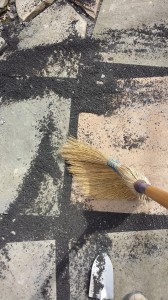
Once the bluestone dust was swept in between the slate pieces, I was ready to sit down! Took some photos though!
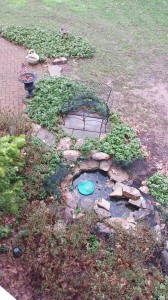
So what eventually happened to the Monet bench that was my peaceful solace? It’s been moved next to the front pond. And yes, I’ve spent a few hours gazing into the pond while sitting on that bench. A far better use of the bench if I do say so myself.
What do you think of my Slate Walkway Project? Leave me a comment and let me know! And don’t hesitate to ask questions.
Leave a Reply
You must be logged in to post a comment.